Google Search Console is a free web service provided by Google that allows Page Indexing and Redirect Issues website owners to monitor and manage the presence of their site in Google’s search results. It provides valuable insights into how Google sees your site, including which pages are indexed, what keywords are driving traffic, and any issues that might be affecting its performance in search results. With Search Console, you can submit sitemaps, request the removal of outdated content, view backlinks, and receive alerts about potential problems such as malware infections or crawl errors. It’s an essential tool for optimizing your site’s visibility and ensuring it performs well in Google’s search engine.
1- Page with redirect

A “page with redirect” refers to a webpage that automatically sends visitors to a different URL or web address. This redirection can be temporary (known as a 302 redirect) or permanent (known as a 301 redirect).
Page redirects are commonly used for various purposes such as:
- Redirecting outdated URLs to new ones after a website redesign or restructuring.
- Sending visitors from an old webpage to a new one when content has been moved.
- Redirecting users from alternate URLs (such as non-www to www versions) to ensure consistent website traffic.
- Directing users to a mobile-friendly version of a webpage when they access it from a mobile device.
Redirects are implemented using server-side configuration or scripting languages like JavaScript. They play a crucial role in maintaining website usability, preserving search engine rankings, and ensuring a seamless user experience when navigating a website.
Fixing pages with redirects typically involves addressing the underlying issues that necessitated the redirects in the first place. Here are steps to fix pages with redirects:
- Review the Purpose: Understand why the redirect was implemented. Determine if it was for a valid reason such as content migration, URL restructuring, or resolving duplicate content issues.
- Update Links: If the redirect was used to point from an old URL to a new one, ensure that internal and external links pointing to the old URL are updated to reflect the new URL. This helps to maintain a consistent user experience and prevents unnecessary redirects.
- Check for Chains: Ensure that there are no redirect chains in place. Redirect chains occur when one redirect points to another, and then another, causing multiple redirects before reaching the final destination. It’s best to minimize or eliminate redirect chains for optimal performance.
- Implement Correct Redirects: If the redirect was implemented incorrectly (e.g., using temporary redirects instead of permanent ones), update it to use the appropriate redirect type. Permanent redirects (301) are preferable for permanent URL changes, while temporary redirects (302) are suitable for temporary changes.
- Review SEO Impact: Assess the potential impact of the redirect on search engine optimization (SEO). Ensure that the new URL maintains or improves upon the SEO attributes of the original URL, such as keywords, meta tags, and content relevance.
- Test and Monitor: After making changes, thoroughly test the redirects to ensure they function as intended. Use tools like Google Search Console or third-party redirect checker tools to identify any issues. Monitor website traffic and search engine rankings to ensure there are no negative impacts.
- Address Root Causes: If the redirect was implemented due to technical issues, duplicate content, or other underlying issues, address those root causes to prevent the need for future redirects. This may involve fixing broken links, resolving duplicate content issues, or improving website structure.
By following these steps, you can effectively fix pages with redirects and ensure a smoother user experience and better SEO performance for your website.
2- Redirect error

A “redirect error” occurs when a web server attempts to redirect a user from one URL to another, but encounters a problem during the redirection process. This error typically indicates that there is an issue with the configuration of the redirect, the target URL, or the server’s ability to handle the redirection request.
Common causes of redirect errors include:
- Incorrect Redirect Configuration: The redirect may be misconfigured, such as pointing to an invalid or non-existent URL, leading to a redirect loop, or using the wrong redirect type (e.g., using a temporary redirect instead of a permanent one).
- Server Configuration Issues: Problems with the server’s configuration, such as misconfigured .htaccess files, server settings, or caching mechanisms, can interfere with the proper execution of redirects.
- Target URL Errors: The target URL that the redirect is pointing to may be experiencing issues, such as being temporarily unavailable, returning errors, or being improperly formatted.
- Redirect Loops: A redirect loop occurs when a series of redirects continuously point back to each other, resulting in an infinite loop of redirection attempts.
- DNS Issues: Problems with Domain Name System (DNS) configuration or resolution can prevent the server from properly redirecting users to the intended destination.
- SSL/TLS Certificate Errors: If the target URL requires HTTPS and there are issues with the SSL/TLS certificate, the redirect may fail to complete successfully.
When encountering a redirect error, it’s essential to troubleshoot and identify the root cause of the issue. This may involve reviewing the server logs, checking the redirect configuration, verifying the target URL, and addressing any underlying issues with the server or website configuration. Once the problem is identified, appropriate steps can be taken to resolve the redirect error and ensure smooth redirection for users visiting the website.
To fix redirect errors, you’ll need to identify and address the underlying issues causing the redirects to fail. Here’s a step-by-step guide:
- Identify the Error: Determine the specific type of redirect error encountered (e.g., 301, 302, or 5xx server error).
- Check Redirect Configuration: Review the configuration of the redirect to ensure it’s set up correctly. Verify that the source URL, target URL, and redirect type (permanent or temporary) are accurate.
- Verify Target URL: Ensure that the target URL (the destination of the redirect) is accessible and properly formatted. Check for any errors or issues with the target page or website.
- Resolve Server Configuration Issues: Address any server-side configuration issues that may be affecting the redirect. This could include fixing misconfigured .htaccess files, server settings, or caching mechanisms.
- Fix Redirect Loops: If a redirect loop is occurring, identify the cause of the loop (e.g., conflicting redirect rules) and adjust the redirect configuration to break the loop.
- Resolve DNS Issues: If DNS configuration problems are suspected, work with your domain registrar or hosting provider to ensure DNS settings are correctly configured and resolving to the intended server.
- Check SSL/TLS Certificates: If the target URL requires HTTPS and SSL/TLS certificate errors are occurring, resolve any certificate issues to ensure secure and successful redirection.
- Test and Monitor: After making changes, thoroughly test the redirects to ensure they’re functioning as expected. Monitor server logs, website traffic, and user feedback to confirm that the redirect errors have been resolved.
- Address Root Causes: Identify any underlying issues that may have led to the redirect errors, such as broken links, outdated URLs, or website restructuring. Address these root causes to prevent future redirect errors.
- Document Changes: Keep detailed records of the changes made to fix the redirect errors, including the specific actions taken and their outcomes. This documentation can be valuable for troubleshooting future issues and maintaining the health of your website.
By following these steps and systematically addressing the underlying causes of redirect errors, you can effectively fix and prevent redirection problems on your website.
3- Page Not found (404)
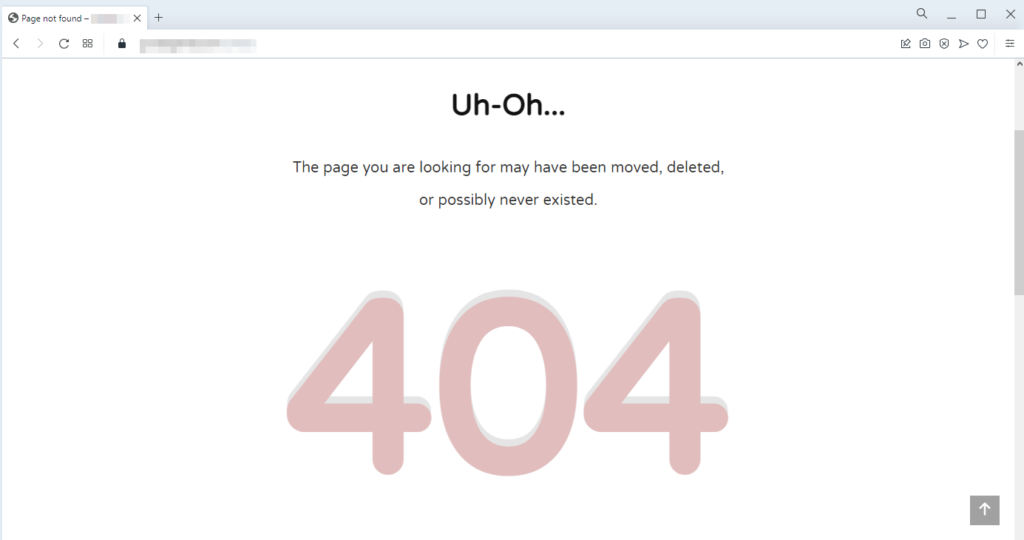
A “Not Found (404)” error is an HTTP status code that indicates the web server couldn’t find the requested webpage. When a user attempts to access a URL that doesn’t exist or is unavailable, the server responds with a 404 error to notify the user that the requested resource could not be located.
Common causes of 404 errors include:
- Broken Links: When a hyperlink points to a URL that has been deleted, moved, or mistyped, users encounter a 404 error.
- Deleted Pages: If a webpage has been intentionally removed from a website without implementing proper redirects, attempts to access the deleted page will result in a 404 error.
- Typos in URLs: Users may enter URLs with typographical errors, leading to 404 errors if the mistyped URL doesn’t correspond to a valid webpage.
- Incorrect URL Structure: URLs with incorrect formatting or structure can trigger 404 errors if they don’t match the expected pattern for accessing content on a website.
- Website Restructuring: Changes to a website’s structure, such as renaming or reorganizing directories, can result in 404 errors if old URLs are not properly redirected to new ones.
- Server Configuration Issues: Misconfigurations in the web server’s settings or directives, such as .htaccess files, may cause 404 errors when attempting to access certain URLs.
- Expired Content: Content that was previously accessible but has since expired or been removed from the website’s database may trigger 404 errors.
When users encounter a 404 error, it’s important for website owners to:
- Provide a user-friendly error page (custom 404 page) that informs visitors about the error and offers helpful navigation options to guide them to relevant content.
- Monitor website analytics and error logs to identify patterns of 404 errors and address them promptly.
- Implement proper redirects (such as 301 redirects) for permanently moved or deleted content to redirect users to relevant pages.
- Regularly audit the website for broken links and outdated content to minimize the occurrence of 404 errors and maintain a positive user experience.
To fix “Not Found (404)” errors on a website, you can follow these steps:
- Identify the Missing Page: Determine which page or resource is generating the 404 error. This can be done by reviewing your website’s error logs or using online tools to identify broken links.
- Update or Restore the Content: If the missing page was removed accidentally or intentionally, consider restoring it to its original location. If the content is outdated or no longer relevant, create a new page with similar or updated content.
- Implement a Custom 404 Page: Create a custom error page that provides helpful information to users when they encounter a 404 error. This page should include a brief explanation of the error, suggestions for finding relevant content, and links to key sections of your website.
- Redirect Broken Links: If the missing page has been permanently moved or replaced by a new URL, set up a 301 redirect from the old URL to the new one. This ensures that users and search engines are redirected to the correct page automatically.
- Update Internal Links: Review your website’s internal links and update any references to the missing page to point to the correct URL. This helps users navigate your website more easily and prevents them from encountering 404 errors.
- Check External Links: If other websites are linking to the missing page, reach out to the site owners and request that they update their links to point to the correct URL. Alternatively, you can set up 301 redirects from the old URLs to relevant pages on your site.
- Submit a Sitemap to Search Engines: After making changes to fix 404 errors, submit an updated sitemap to search engines like Google and Bing. This helps search engine crawlers discover and index the corrected URLs more quickly.
- Monitor and Maintain: Regularly monitor your website for new 404 errors and address them promptly. Use tools like Google Search Console or third-party website auditing tools to identify broken links and other issues that may cause 404 errors.
By following these steps and actively maintaining your website, you can effectively fix “Not Found (404)” errors and ensure a better user experience for your visitors.
4- Excluded by ‘noindex’ tag
Excluded by ‘noindex’ tag” refers to a status in which a webpage has been deliberately excluded from search engine indexing using a “noindex” meta tag. When search engine crawlers visit a webpage and encounter a “noindex” meta tag in the HTML code, they understand that the page should not be included in search engine results pages (SERPs).
The “noindex” meta tag is a directive that webmasters can use to communicate to search engines that a particular webpage should not be indexed. This can be useful for various reasons, such as:
- Temporary Content: Content that is not intended to be indexed or displayed in search results temporarily, such as under construction pages or private content.
- Duplicate Content: Pages with duplicate content that should not be indexed to avoid penalties for duplicate content by search engines.
- Thank You Pages: Pages that users land on after completing an action (e.g., submitting a form or making a purchase) but don’t provide meaningful content for search engine users.
- Archived Content: Old or outdated content that is no longer relevant but is retained on the website for historical purposes.
When a webpage is excluded by a “noindex” tag, it will not appear in search engine results pages, even if it’s accessible via direct URL. Webmasters can use tools like Google Search Console to identify pages on their website that are excluded by the “noindex” tag and make adjustments as needed to ensure that only relevant and valuable content is indexed and displayed in search results.
To avoid pages being excluded by the “noindex” tag, follow these steps:
- Review Meta Tags: Regularly audit your website’s meta tags to ensure that no “noindex” directives are inadvertently added to important pages. Check your CMS settings, plugins, or theme settings to ensure that they’re not automatically adding “noindex” tags.
- Use Robots.txt Carefully: Avoid blocking important pages from search engine crawlers using the robots.txt file. While robots.txt can prevent crawling, it doesn’t prevent indexing. Use it judiciously and combine it with other methods like meta tags or HTTP headers if necessary.
- Check CMS Settings: If you’re using a content management system (CMS) like WordPress, review the settings to ensure that they don’t inadvertently add “noindex” tags to your pages. Some plugins or themes may have settings that affect indexing.
- Be Cautious with Development Sites: If you have a development or staging site, make sure it’s properly secured and not inadvertently accessible to search engine crawlers. Use password protection or IP whitelisting to prevent indexing.
- Regularly Review Changes: Whenever you make changes to your website, whether it’s updating content or modifying settings, double-check that you haven’t accidentally added a “noindex” tag. Use tools like Google Search Console to monitor indexing status and receive alerts for any unexpected changes.
- Test in Staging Environment: Before deploying changes to your live website, test them in a staging environment. This allows you to catch any unintended consequences, such as pages being inadvertently excluded by the “noindex” tag, before they impact your live site.
- Educate Team Members: If multiple people have access to your website’s settings or CMS, ensure they understand the implications of adding a “noindex” tag. Provide training or documentation on best practices for SEO and indexing control.
By following these steps and staying vigilant about potential sources of “noindex” tags, you can minimize the risk of important pages being excluded from search engine indexing and ensure that your content remains visible and accessible to users in search results.
5- Alternate page with proper canonical tag

An “alternate page with proper canonical tag” refers to a webpage that serves as an alternative version of another page on the same website, with a canonical tag correctly implemented to indicate the preferred version to search engines.
Here’s what each component means:
- Alternate Page: This is a version of a webpage that may differ from the original in some way, such as language, region-specific content, or device type (e.g., desktop vs. mobile). Alternate pages are typically created to cater to different audiences or provide customized experiences.
- Canonical Tag: The canonical tag (rel=”canonical”) is an HTML element used to specify the preferred version of a webpage when multiple versions exist. It tells search engines which URL should be considered the primary or canonical version, particularly important for avoiding duplicate content issues.
When implementing an alternate page with a proper canonical tag, the process involves:
- Creating alternate versions of the webpage to cater to different audiences or purposes.
- Adding a canonical tag to each alternate page, specifying the canonical URL (usually the original or preferred version) that search engines should prioritize.
- Ensuring that the canonical tag points to a valid, fully functional URL that accurately represents the primary content.
For example, if you have an English-language webpage with an alternate version in Spanish, the English page might include a canonical tag pointing to itself as the preferred version, while the Spanish page would include a canonical tag pointing to the English version.
By implementing alternate pages with proper canonical tags, website owners can provide tailored content for different audiences while ensuring that search engines understand which version to prioritize in their indexing and ranking algorithms. This helps prevent duplicate content issues and ensures a better user experience for visitors accessing the website from various sources.
Implementing alternate pages with proper canonical tags can help avoid several issues:
- Duplicate Content Penalties: Search engines may penalize websites for having duplicate content across multiple URLs. By specifying the canonical version of the page using the canonical tag, you can prevent search engines from treating alternate versions as duplicate content.
- Confusion in Search Results: Without canonical tags, search engines may choose to index and display alternate versions of the same page separately in search results. This can confuse users and dilute the visibility and ranking potential of the primary version. Canonical tags help consolidate indexing signals to the preferred version, improving its visibility in search results.
- Link Equity Dilution: When multiple versions of a page exist, inbound links may be spread across these variations, diluting the overall link equity. By consolidating indexing signals to the canonical version, you can ensure that the primary page receives the full benefit of inbound links, helping to improve its search engine rankings.
- Crawl Budget Optimization: Search engine crawlers have limited resources to crawl and index webpages. By specifying the canonical version of a page, you can help optimize the allocation of crawl budget by guiding crawlers to focus on indexing the primary version rather than crawling and indexing alternate versions unnecessarily.
- Improved User Experience: Providing alternate versions of a page for different audiences or purposes can enhance the user experience. By ensuring that search engines prioritize the canonical version in search results, you help users find the most relevant and authoritative content based on their needs and preferences.
Overall, implementing alternate pages with proper canonical tags helps streamline indexing, improve search engine rankings, optimize crawl budget allocation, and enhance the user experience, ultimately benefiting both website owners and visitors.
6- Crawled – currently not indexed
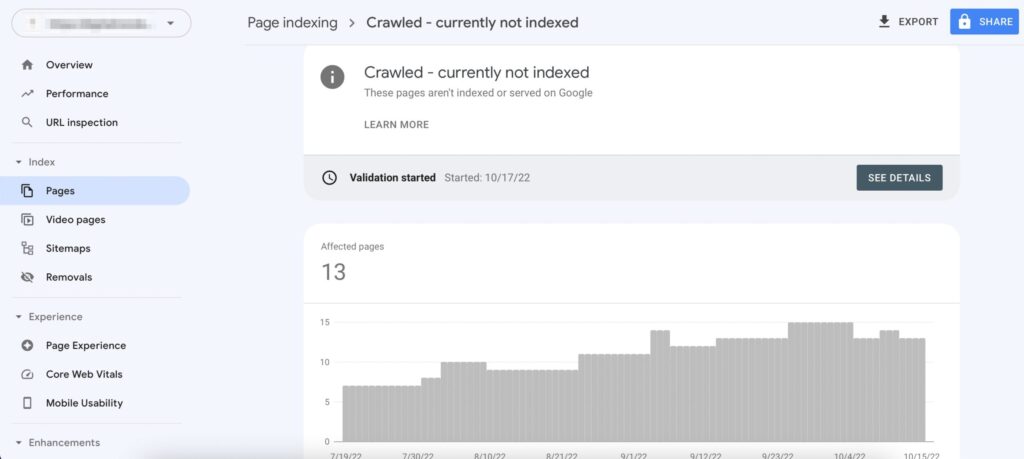
Crawled – currently not indexed” refers to a status reported by search engine tools, such as Google Search Console, indicating that a webpage has been discovered and crawled by search engine bots, but it has not been indexed in the search engine’s database.
Here’s what this status means:
- Crawled: This indicates that search engine bots (also known as crawlers or spiders) have visited the webpage and analyzed its content. During the crawling process, the bots follow links on the webpage to discover and analyze other pages on the site.
- Currently Not Indexed: Despite being crawled, the webpage has not been added to the search engine’s index, which is a database containing information about webpages that the search engine has deemed relevant and worthy of inclusion in search results.
There are several reasons why a webpage may be “crawled – currently not indexed”:
- New or Low-Priority Content: The webpage may contain new or low-priority content that the search engine has not yet deemed significant enough to index. Search engines prioritize indexing based on factors such as relevance, quality, and authority.
- Technical Issues: Technical issues on the webpage or server, such as server errors, slow loading times, or incorrect directives in the robots.txt file, may prevent search engines from properly indexing the content.
- Noindex Tag: The webpage may contain a meta tag with the “noindex” directive, instructing search engines not to index the page. This could be intentional, such as for temporary or private content, or unintentional due to misconfiguration.
- Duplicate Content: If the content on the webpage is considered duplicate or substantially similar to content already indexed by the search engine, it may not be indexed to avoid redundancy in search results.
- Insufficient Quality or Relevance: The content on the webpage may not meet the search engine’s quality or relevance criteria for indexing, such as thin or low-quality content, keyword stuffing, or irrelevant information.
Webmasters can address the “crawled – currently not indexed” status by ensuring that the webpage meets search engine guidelines, optimizing its content and technical aspects, and addressing any issues that may be preventing indexing. This can help improve the likelihood of the webpage being indexed and included in search results.
Addressing the “Crawled – currently not indexed” status can help avoid several potential issues:
- Visibility in Search Results: When a page is not indexed, it won’t appear in search engine results pages (SERPs). By ensuring that important pages are indexed, you increase the likelihood of them being visible to users searching for relevant information.
- Organic Traffic: Indexed pages have the potential to attract organic traffic from search engines. If a page remains uncrawled or unindexed, it misses out on the opportunity to attract visitors who could benefit from its content.
- Content Relevance: Indexed pages contribute to the overall relevance and authority of your website. When a page is not indexed, it doesn’t contribute to your website’s perceived relevance on topics covered by that page, potentially impacting your website’s overall search engine rankings.
- Crawl Budget Optimization: Search engine crawlers allocate a limited amount of resources (crawl budget) to each website. If pages are not indexed, it could indicate inefficiencies in crawl budget allocation. By ensuring that only relevant and valuable pages are crawled and indexed, you optimize your website’s crawl budget.
- User Experience: Indexed pages provide users with access to relevant and authoritative content. When a page is not indexed, users may miss out on valuable information that could enhance their experience on your website.
- SEO Impact: Indexed pages contribute to your website’s overall SEO efforts, including keyword targeting, internal linking, and authority building. Ensuring that important pages are indexed maximizes the potential SEO benefits for your website.
Overall, addressing the “Crawled – currently not indexed” status helps ensure that your website’s content is visible, accessible, and contributing positively to its online presence and search engine performance. It allows you to make the most of your content efforts and provides a better experience for both users and search engines.
7- Duplicate, Google chose different canonical than user

Duplicate, Google chose different canonical than user” indicates that Google has selected a different canonical URL for a webpage than the one specified by the user. This situation arises when Google’s algorithms determine that a different URL should be considered the canonical version, typically due to factors such as content similarity or URL parameters.
To fix this issue, follow these steps:
- Review Canonical Tags: Check the canonical tags (rel=”canonical”) on the webpage to ensure that the specified canonical URL accurately represents the preferred version of the page. If necessary, update the canonical tag to point to the desired URL.
- Content Consolidation: If the webpage has duplicate or similar content across multiple URLs, consider consolidating the content into a single, canonical URL. This may involve redirecting or merging duplicate pages to ensure that there’s only one authoritative version of the content.
- URL Parameters: If the webpage contains URL parameters (e.g., tracking codes, session IDs) that create multiple variations of the same page, use canonical tags or URL parameter handling tools in Google Search Console to indicate the preferred version and prevent indexing of duplicate URLs.
- Content Differentiation: Ensure that each webpage on your site offers unique and valuable content to users. Avoid duplicating content across multiple pages or websites, as this can confuse search engines and dilute the visibility of your content in search results.
- HTML Improvements: Review HTML improvements in Google Search Console to identify any issues related to duplicate content or canonicalization. Address any recommendations provided by Google to improve the indexing and ranking of your webpages.
- Monitor Changes: After implementing fixes, monitor Google Search Console and other SEO tools for changes in indexing status and duplicate content issues. Regularly check for new instances of duplicate content and address them promptly to maintain a healthy website.
By addressing duplicate content issues and ensuring that Google recognizes the correct canonical URL for your webpages, you can improve the indexing, ranking, and visibility of your content in search results, ultimately enhancing the user experience and driving organic traffic to your website.
8- Discovered – currently not indexed

Discovered – currently not indexed” means that search engine crawlers have found a webpage during the crawling process but have not yet included it in their index. This status typically appears in tools like Google Search Console.
To fix pages that are “discovered – currently not indexed,” follow these steps:
- Check Indexing Status: Verify that the webpage is not intentionally excluded from indexing using a “noindex” meta tag or directive in the robots.txt file. Ensure that there are no technical issues preventing the page from being indexed, such as server errors or improper URL canonicalization.
- Content Quality and Relevance: Ensure that the content on the webpage is unique, valuable, and relevant to your target audience. High-quality content is more likely to be indexed by search engines. Review the page for any thin or duplicate content that may be affecting its indexing status.
- Improve Internal Linking: Ensure that the webpage is accessible to search engine crawlers by including internal links pointing to it from other pages on your website. Internal linking helps distribute link equity and signals to important pages, improving their chances of being indexed.
- Submit Sitemap: Create and submit a sitemap to search engines like Google and Bing. A sitemap helps search engine crawlers discover and index pages on your website more efficiently. Include the URL of the page in the sitemap to ensure it’s crawled and indexed.
- Fetch as Google: Use the “Fetch as Google” feature in Google Search Console to request indexing of the webpage. This tool allows you to submit individual URLs to Google for crawling and indexing. Monitor the Fetch status to ensure the page is successfully indexed.
- External Links and Promotion: If the webpage is new or has recently been updated, consider promoting it through external channels such as social media, email newsletters, or other websites. External links from reputable sources can help improve the visibility and indexing of the page.
- Monitor and Patience: Keep an eye on the indexing status of the webpage in Google Search Console or other SEO tools. Indexing may take some time, so be patient and continue to monitor the page’s performance in search results.
By following these steps and addressing any issues that may be preventing indexing, you can increase the likelihood of your webpage being indexed by search engines and appearing in search results, ultimately driving traffic and visibility to your website.
In conclusion, managing page indexing and redirect issues is crucial for maintaining the visibility and performance of your website in search engine results. Google Search Console provides valuable insights and tools to address these issues effectively.
Pages indexing with redirects require careful attention to ensure they serve their intended purpose without causing negative impacts on user experience or SEO. By reviewing the purpose of redirects, updating links, checking for redirect chains, implementing correct redirects, and addressing underlying issues, website owners can optimize their site’s visibility and performance.
Redirect errors can disrupt the user experience and hinder search engine crawlers’ ability to index content. Addressing these errors involves identifying and resolving issues with redirect configuration, target URLs, server settings, and other technical factors to ensure smooth redirection and proper indexing.
Not Found (404) errors can frustrate users and signal technical issues or outdated content on a website. By identifying missing pages, updating or restoring content, implementing custom error pages, redirecting broken links, and submitting sitemaps, website owners can improve user experience and maintain a healthy site structure.
Excluding pages by the ‘noindex’ tag, choosing proper canonical tags, and addressing pages crawled but not indexed are essential for controlling how search engines index and display your content. Implementing canonical tags, avoiding duplicate content, improving crawlability, and monitoring indexing status help ensure that your content is visible, relevant, and accessible to users.
Addressing duplicate content and ensuring proper indexing of discovered pages require ongoing monitoring, technical expertise, and strategic optimization efforts. By following best practices, leveraging available tools, and staying informed about search engine algorithms and guidelines, website owners can maximize their site’s visibility and performance in search results, ultimately driving organic traffic and achieving their online objectives.


