
Making a great website is tough without knowing what’s happening on it. It’s like trying to walk on a tightrope with your eyes closed – possible, but way easier with some light. That’s where Google Analytics comes in.
Think of Google Analytics as the switch that turns on the lights for your website. It shows you who’s visiting, how they found your site, and what they’re doing there. With this info, you can make your website even better.
This guide will help you understand:
- What Google Analytics is
- Why it’s important to use Google Analytics
- How to set it up
- Using Google Analytics
- Making Your Website Better with Google Analytics
What Google Analytics?
Google Analytics is like a helpful tool made by Google for people who own websites. It’s kind of like a detective that tells you how visitors use your website. It keeps track of important stuff, like how many people come to your site, where they’re from, and what they do on your site.
With Google Analytics, you get to know interesting things about how users act, such as which pages they like the most, how long they stay on your site, and what actions they take, like buying something or filling out a form. This info is cool because it helps you decide how to make your website better and more user-friendly.
What’s cool about Google Analytics is that it’s free, so even if you’re a small business or just one person, you can use it without spending lots of money. By understanding how your website is doing, you can plan your marketing better to reach the people you want and get better results.
In a nutshell, Google Analytics is a super useful tool that tells you how your website is doing and helps you decide how to make it even better for the people who visit.

Why Use Google Analytics?
When you made your website, it was to tell people about your stuff and turn them into loyal customers. To do that well, you need to know where they come from, what they really like, and how they become customers.
By using Google Analytics (GA), you can look at your website’s data to figure out smart ways to get more people interested and make more money.
Is Google Analytics Free?
Yes, Google Analytics is totally free! But there are some limits to how much data it collects. Most small businesses won’t hit these limits, so it’s usually good for them. If you ever wonder, just look for the green checkmark – it means the info in the report is accurate and not just a part of it.

How to Set it Up?
Imagine you’re trying to catch fish – you need a net first, right? Well, for Google Analytics to gather info about your website, it has to be set up. The quicker you do it, the better.
Follow these three steps to set up and check Google Analytics:
- Create and Set Up Your Google Analytics Account:
- Go to analytics.google.com.
- Click on “Start measuring.”
- Put in a name for your account (use your company name).
- Adjust data sharing settings if you want.
- Click “Next.”
- Name your property (your website’s name is perfect).
- Check the time zone and currency (make sure it matches where your business is).
- Click “Show advanced options.”
- Turn on the option for ‘Create a University Analytics property’ (it’s a good idea for better measures).
- Put in your Website URL.
- Click “Next.”
- Share info about your industry and business size if you want.
- Click “Create.”
- Agree to Google Analytics Terms of Service (make sure to know the rules for your area).
- Double-check web stream details (things like HTTP vs. HTTPS and www vs. non-www need to be right for accurate info).
Setting up Google Analytics is like getting your fishing net ready – it helps you catch the data you need!
2. Adding the GA Tag to Your Website
Now, let’s talk about putting the GA tag on your website. Without it, Google Analytics can’t grab any data. How you do this depends on the type of website you have.
If you’re using WordPress:
- Get the GA Google Analytics plugin.
- Go to the plugin settings.
- Copy your Measurement ID from Google Analytics.
- Paste the Measurement ID into the GA tracking ID box in the plugin settings.
- Choose Global Side Tag from the Tracking Method options.
- Click Save Changes.
For Wix users:
- Go to Marketing Integrations.
- Under Google Analytics, click Connect.
- Click Connect Google Analytics.
- Paste your Measurement ID from Google Analytics.
- Check the IP Anonymization box if you want to hide visitors’ IP addresses.
- Click Save.
For other platforms:
- Google has instructions for many platforms, but not all support the new “G-” ID in GA.
- Sometimes, you’ll need to install manually by putting the gtag.js code into the <head> section of your website.
- Another option is using Google Tag Manager (GTM). It’s a bit advanced for beginners, but it’s great for adding various marketing tags.
If you’re curious about Google Tag Manager, you can learn more here.

3. Testing Your Setup
After putting Google Analytics on your website, it’s important to check if everything’s working right. Mistakes happen, so testing is like making sure your new toy works before playing with it.
Here’s an easy way to test with Google’s Tag Assistant Chrome extension:
- Install the extension.
- Open your website.
- Click on the extension’s icon in your browser bar.
- Click Enable and refresh your webpage.
If everything is good, the tag will be happy and green.
But if something’s wrong, the tag will be sad and red.

It’s like checking your homework before showing it to the teacher – making sure everything is just right!
Setting Up Goal Tracking
So, Google Analytics is like a detective that automatically watches what people do on your website, like scrolling, clicking, searching, and downloading stuff.
The cool part is, you can pick certain actions, like filling out forms or making phone calls, and say, “Hey, Google Analytics, consider these as important goals.” It helps you keep an eye on the things that really matter.
Here’s how you do it in GA:
- Go to your GA property.
- Click on “configure” on the left side (it looks like a little table icon).
- There’s a toggle switch thingy that says “mark as conversion” – just slide it for the actions you want to count as goals.
It’s like telling Google Analytics, “Hey, these things are super important to me, so let me know when they happen!”

Using Google Analytics
Now that everything’s set up, let’s figure out how to use Google Analytics. It can tell you loads about your website, but there’s no one-size-fits-all way to use it. How you use it depends on what you want to know.
Instead of diving into every detail, let’s focus on the basics. GA helps you understand how people find your site, what they do there, and how they go from just looking to actually doing something (like buying).
Acquisition: This is about how people find your site. In GA, there are two parts: User Acquisition and Traffic Acquisition.
- User Acquisition: This is about how users engage.
- Traffic Acquisition: This is about sessions (how many times people visit).
To check User Acquisition:
- Log in to Google Analytics.
- Click on Life Cycle reports.
- Click on Acquisition reports.
- Choose User acquisition.

You can tweak the report to show things like user demographics or devices, but let’s keep it simple for now and look at “All Users.”
The graphs will show how people first found your site.
For example, “organic” means people found you through search engines like Google or Bing.
Understanding this helps you know where your visitors come from and what they’re interested in. It’s like a map for your website!
Understanding Engagement with Google Analytics
Okay, now let’s talk about what people actually do on your website. This is called “engagement,” and it helps you know if your site is interesting to visitors.
Engagement Reports: These reports tell you things like how long people spend on your site, how many scroll through most of your page, and other actions like events and conversions (when visitors do something important, like make a purchase).
Pages and Screens Report: Let’s focus on one of these reports called “Pages and screens.” Here’s how you get there:
- Log in to Google Analytics.
- Click on Life Cycle reports.
- Go to Engagement reports.
- Click on Pages and screens.
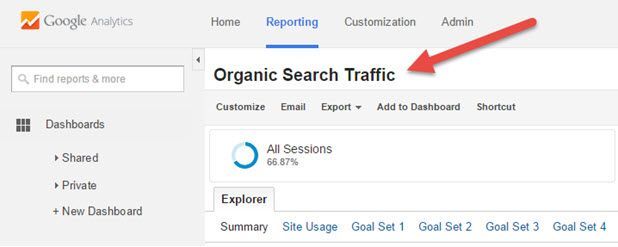
You can make it more specific by looking at different marketing channels. For example, you can see how people from organic searches (like Google) engage with your site.

The graphs and charts will show you things like which pages are popular or how long people stay on your site.
You can also change what you see in the report. For example, you can look at the page title or the URL.
It’s like looking at a map of your website to see where people are spending the most time. This helps you make your site even better for them!
Understanding Conversions with Google Analytics
Alright, let’s talk about something super important – conversions. This means figuring out what actions on your website actually help your business succeed. For an online store, it could be when someone buys something. For a website that gets leads, it might be when someone fills out a contact form.
Conversions Report: This report tells you which user actions are making your business do well. In GA, these are called “goals,” and they happen when users do important things on your site.
Getting to the Conversions Report:
- Log in to Google Analytics.
- Click on Life Cycle reports.
- Go to Engagement reports.
- Click on Conversions.
Now, remember, this report is kind of a big deal, even though it’s technically part of Engagement reports. It shows you what’s really working on your website.

The graphs and charts will tell you which events (like purchases or form submissions) are happening the most.
For an online store, you might want to check out specific events, like when users start the checkout process. You can do this by clicking on the event name ‘begin_checkout.’
This helps you see where your visitors come from, how many times they do what you want, and how much it’s worth to your business.
You can play around with the report by changing what you see – like the number of conversions or where the events come from.
It’s like looking at a report card for your website to see what it’s really good at!
Making Your Website Better with Google Analytics
Okay, so you’ve got Google Analytics set up, and you know a bit about how to check reports. Now, let’s dive into how you can actually use all this info to make your website awesome!
Improve Traffic: You want more people to visit your site, right? Well, let’s find out where they’re coming from.
- Go to User Acquisition under Acquisition.
- Set Column 1 to First user medium.
- Click on New Users to see which channels bring in the most visitors.
Look at things like engagement rate or average engagement time to see which efforts bring in the most confident visitors. It’s like figuring out where your fans are coming from!
Improve Content Effectiveness: You also want to know which pages are like magnets for visitors. Here’s how:
- Go to Pages and Screens under Engagement.
- Click All users at the top.
- Change the dimension to First user medium.
- Select organic as the dimension value.
See which pages bring in the most new visitors – those are your winners! For pages with zero traffic, maybe rethink if they fit your goals.

Improve Geographical Targeting: If you’re into ads or SEO for different locations, check where your best customers are coming from:
- Go to Demographic details under Demographics.
- Sort the table by engagement rate, specific event, or total revenue.
This helps you fine-tune your ads for different places. You can even get super specific with towns or regions!
Final Thoughts: Setting up Google Analytics might seem tricky, but even with basic reports, you can start making your site better. Spend a little time each day, and you’ll see it’s worth it. It’s like planting seeds that grow into a cool garden for your website!
If you want more information about SEO, then you can visit here


